Putting an iPhone Under Control
Admin panel → iPhone → cable + Apple Configurator → activation → “Under control”
Organization: TSDQWISH, MChJ · Time: 5–8 minutes per device
Sale in the admin panel
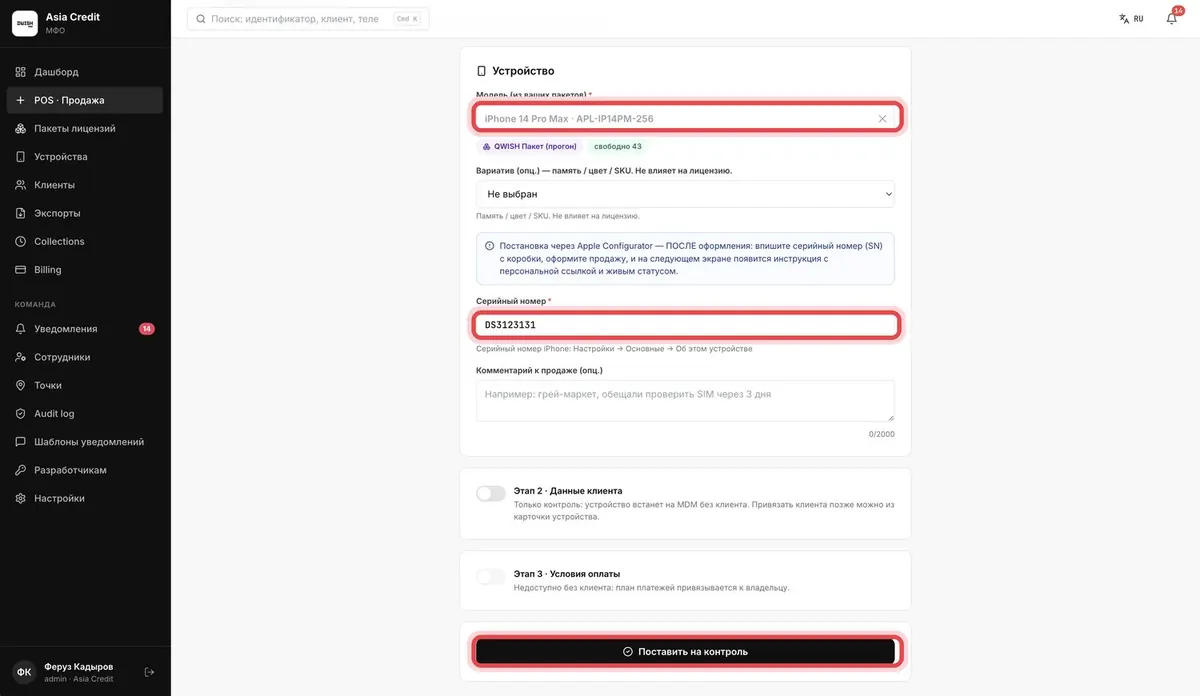
BROWSER · ADMIN PANELSelect the device model, enter the serial number from the box, and press “Put Under Control”.
Device page
BROWSER · ADMIN PANELThe device has been accepted. Press “Device Page” and keep it open until the end.

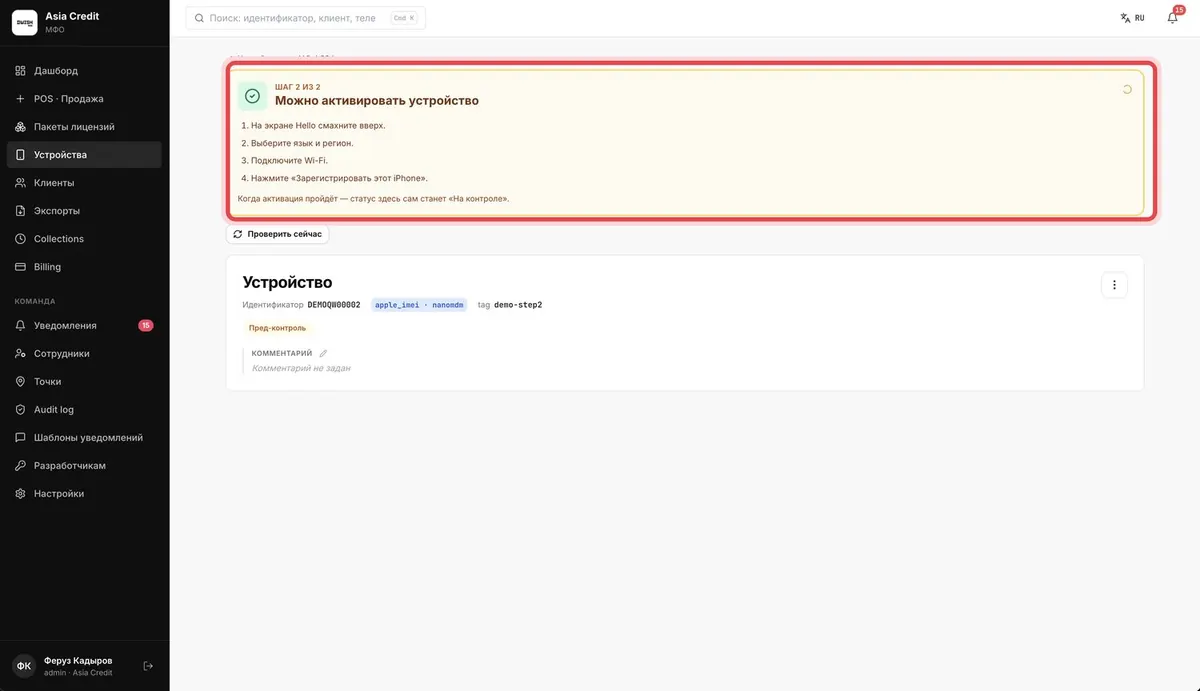
Step 1 of 2 on the device page
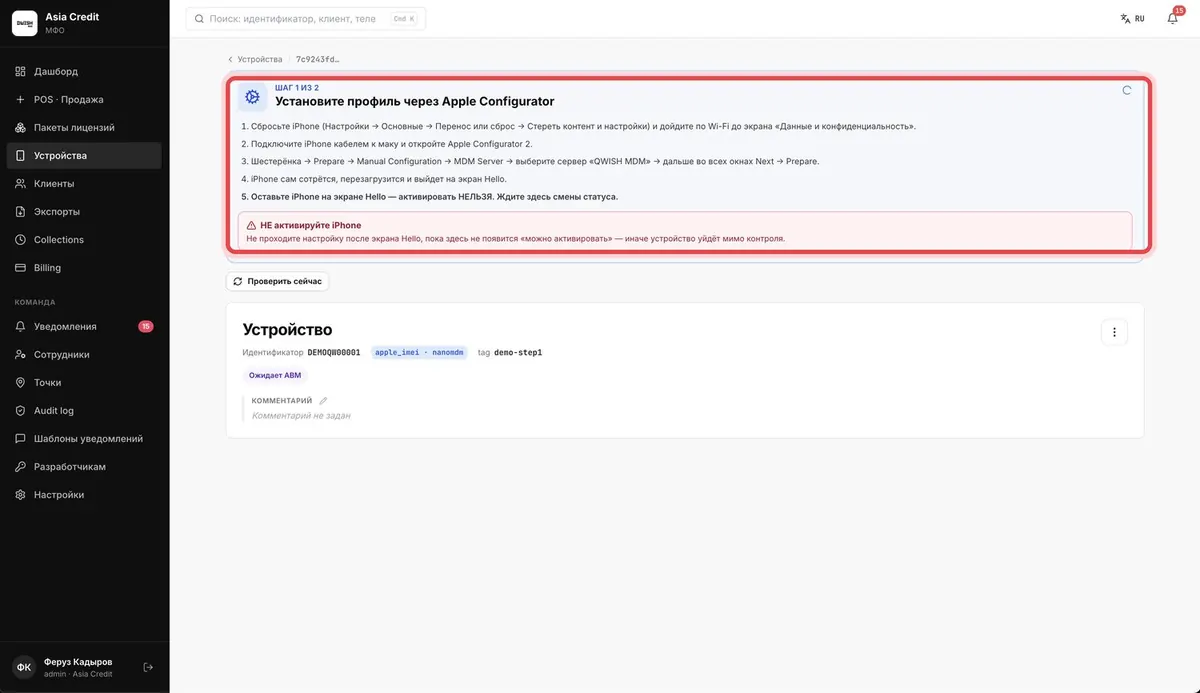
BROWSER · ADMIN PANELThe device page opens with instructions and status. Leave this screen open and go to the next step.
Get to the “Data & Privacy” screen
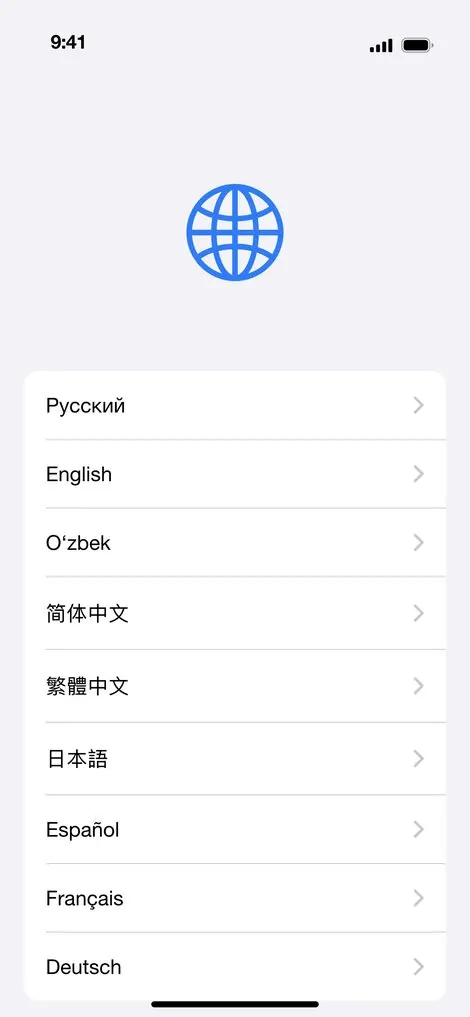
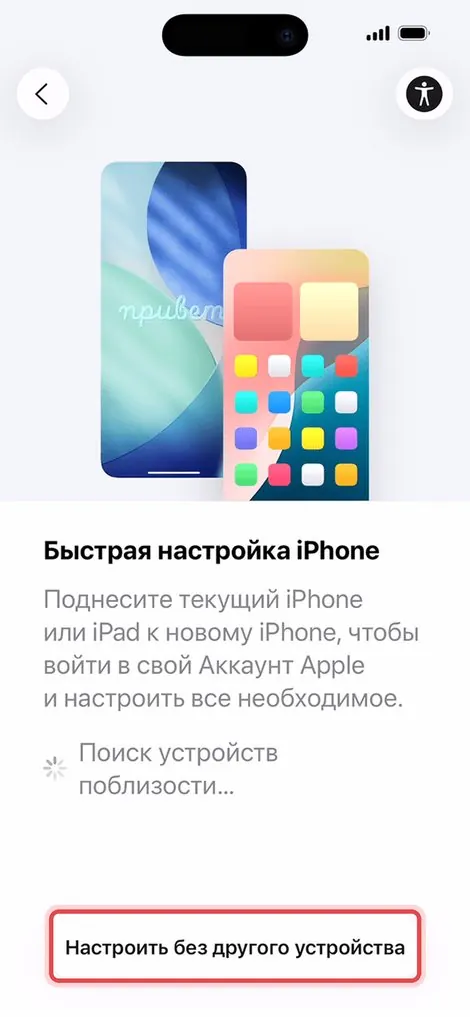
IPHONE · IN HANDTake a new or erased iPhone. Go through the screens in order. On the “Data & Privacy” screen — STOP! Don't tap anything.




Connect the device to the MacBook
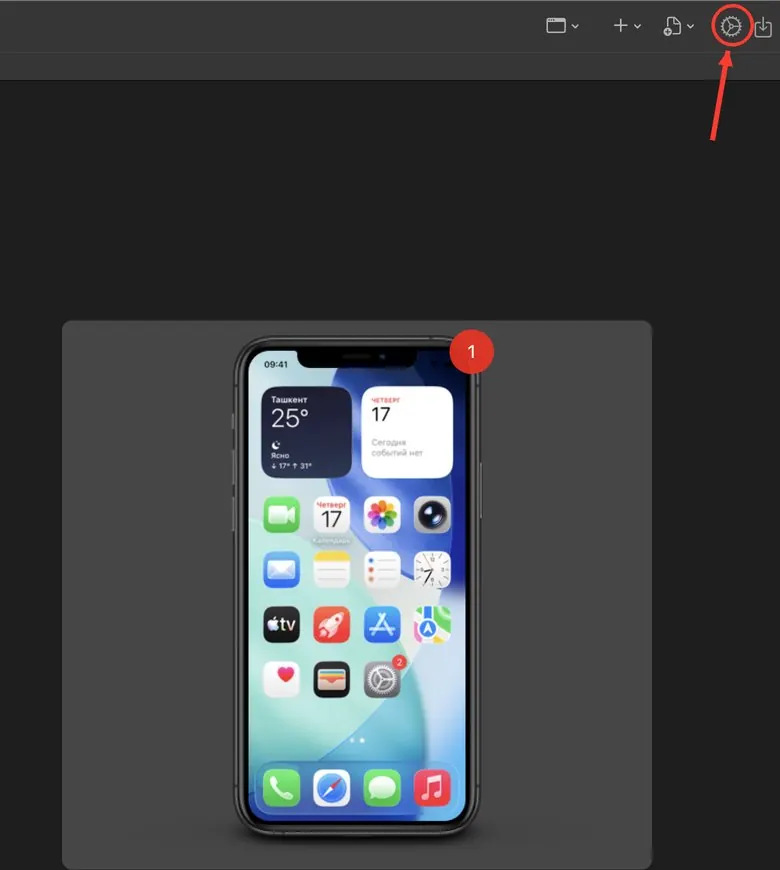
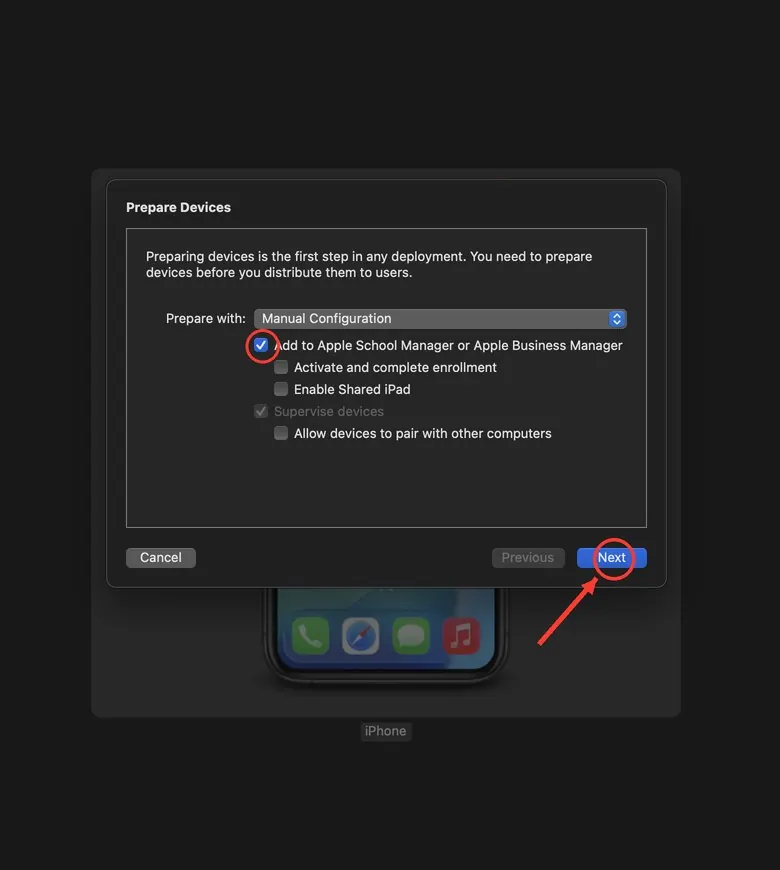
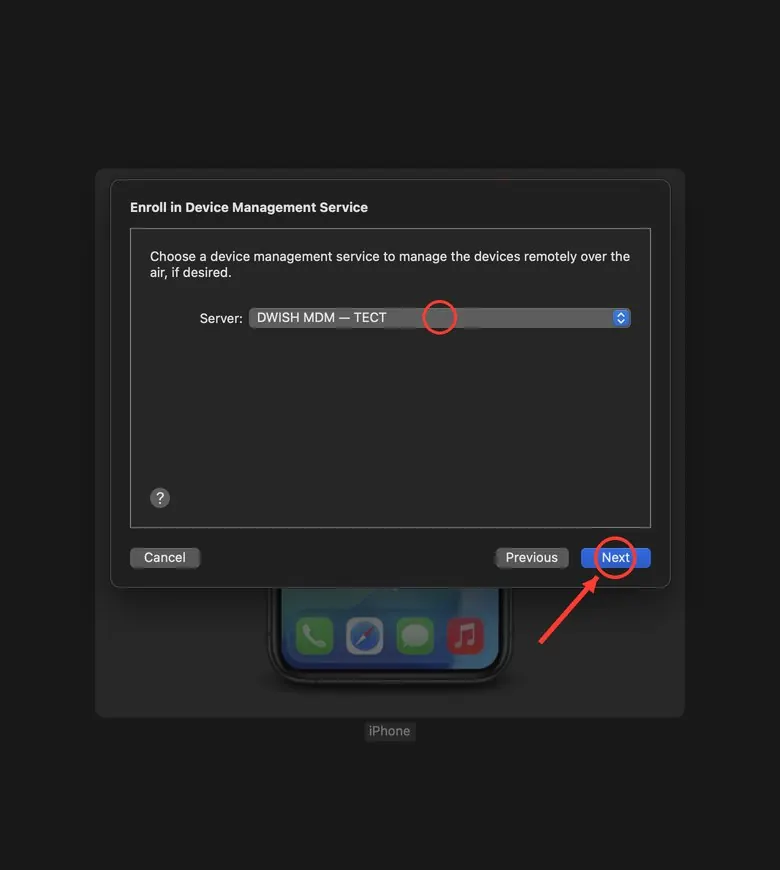
MAC · APPLE CONFIGURATORConnect the iPhone to the MacBook with a cable and open Apple Configurator. Select the iPhone (1) and press the gear icon (2). Then press Next in every window without changing anything. In the last window — Prepare.
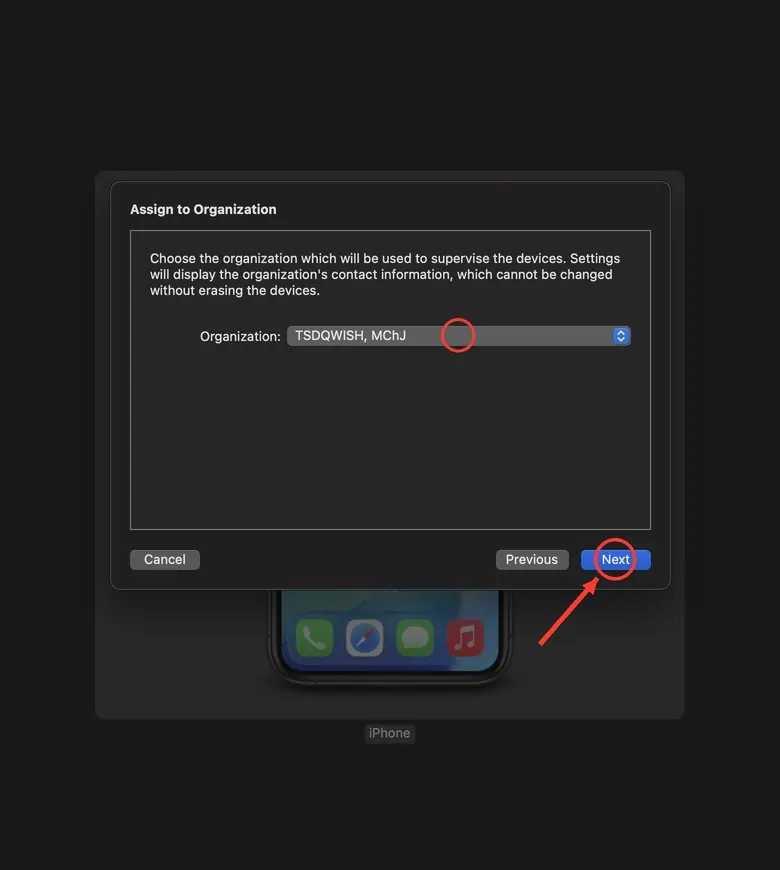
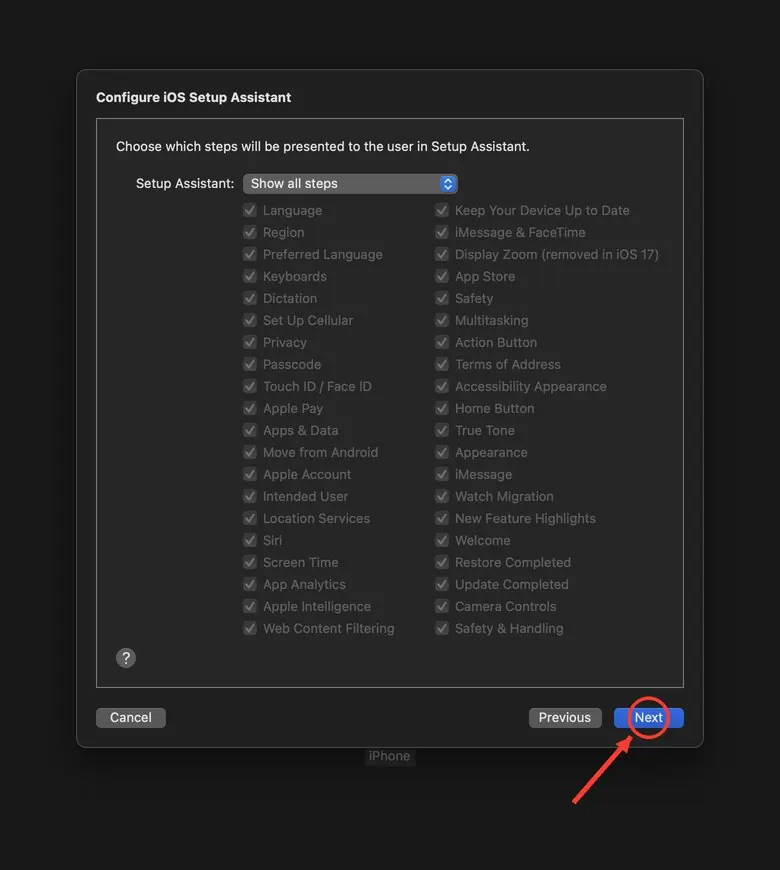
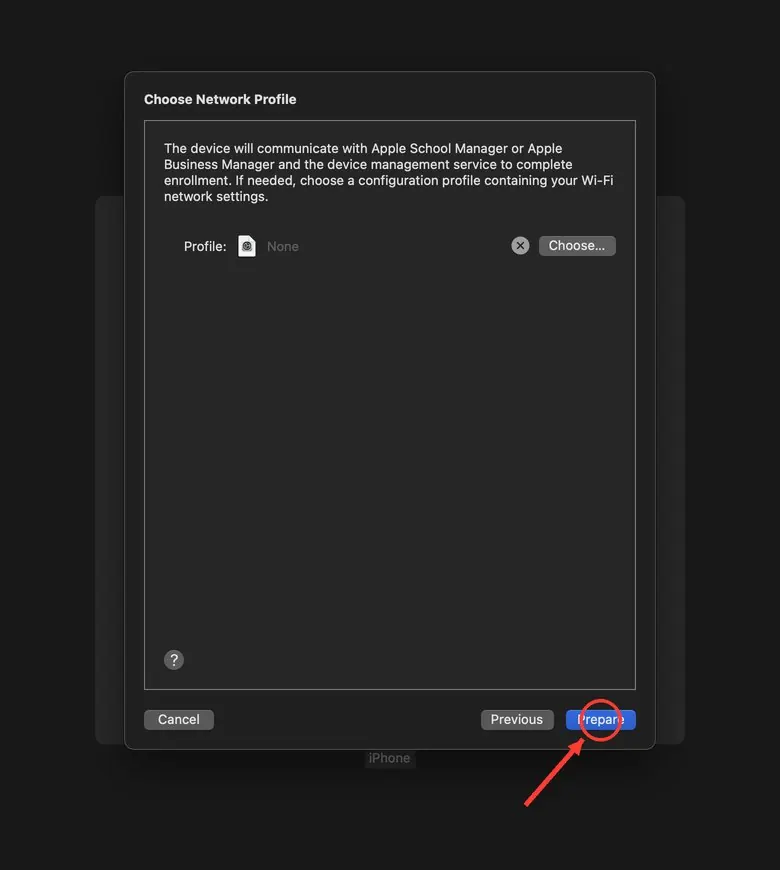
Waiting for the phone to restart
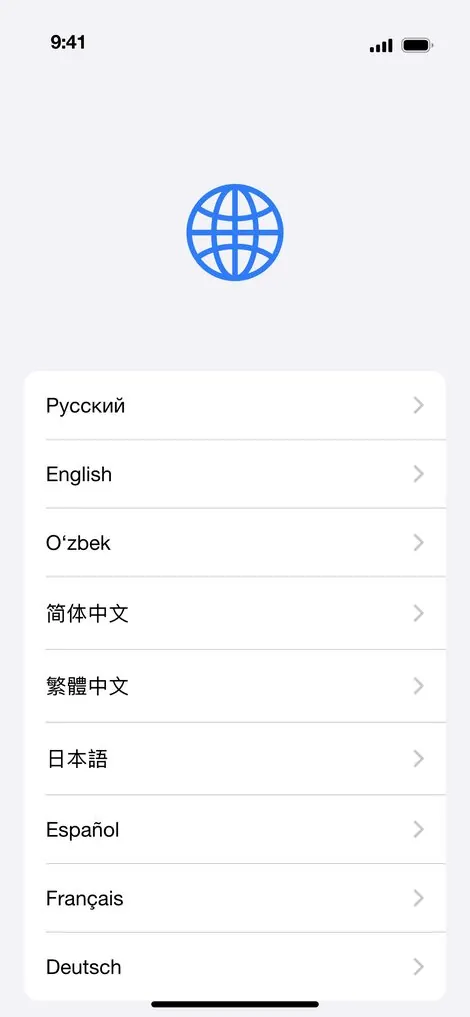
MAC · APPLE CONFIGURATORWait, do not unplug the cable. The iPhone will erase itself and fully restart. When the first “Hello” screen appears — move to the next step.
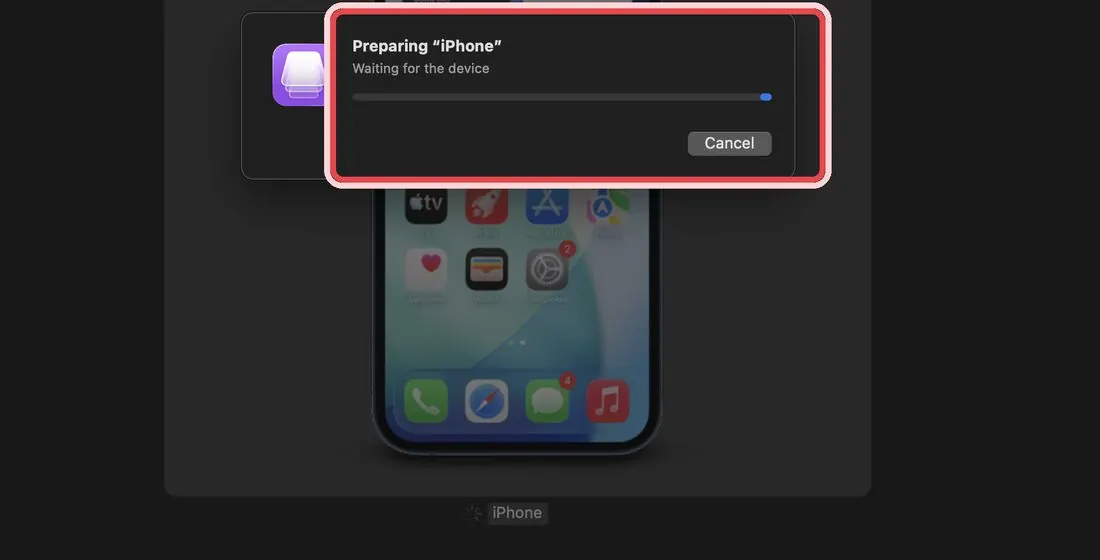
Waiting for “Step 2 of 2” on the device page
BROWSER · ADMIN PANELWait for “Step 2 of 2 · Device can be activated” to appear on the device page. IMPORTANT! Move to the next step only once “Device can be activated” appears.
Activation and enrollment
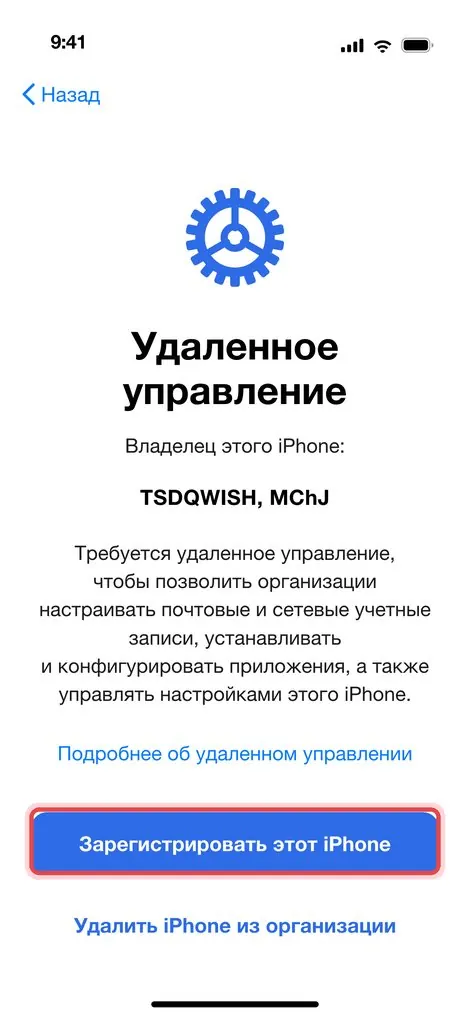
IPHONE · IN HANDGo through the screens in order again. At the end, press “Enroll This iPhone”.



Wait for the device to come under control
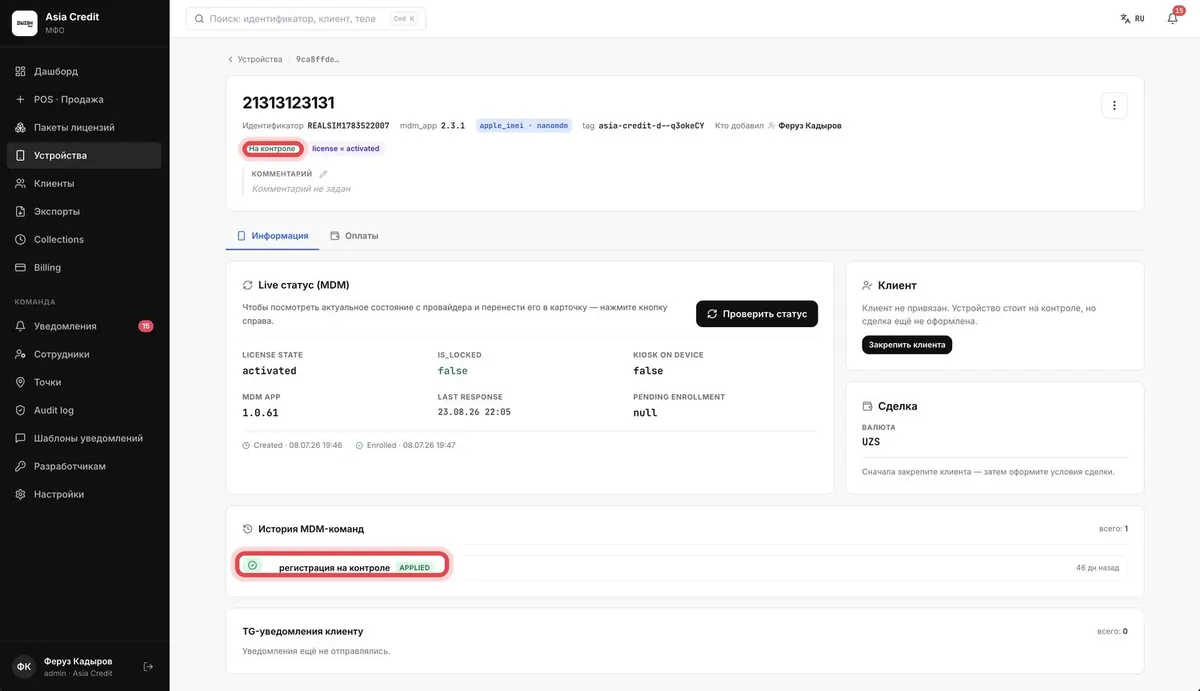
BROWSER · ADMIN PANELWait for the green “Under control” badge to appear on the device page. Done — hand the phone to the customer.